The Layout Model Editor is used to edit existing models or to create
new models. The Editor is opened with the
Tools->Layout Model Editor menu.
Layout Models menu.
The models that the user has edited or created
will have "(local)" after the name.
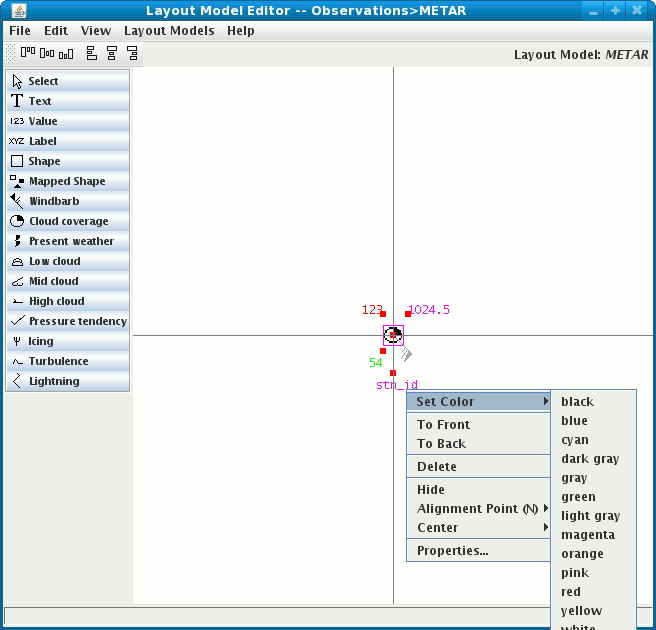
The display shows a horizontal line and a vertical line through the observation location. These axis lines give a reference point. A station model consists of a set of shapes which are added by clicking on an item in the left column and then clicking where you want to place it (relative to the observation center point or location point). It will appear with a surrounding outline box and 8 control points you can drag to resize the item. When a shape is created its property dialog is shown (described below).
Shapes can be moved by dragging with the mouse. Click on any item with the right mouse button to see a pop-up menu of choices to control its appearance. You can delete an item, set its color, or change font sizes, view its properties, etc.
Each item has a single red "Alignment point" that is used for to locate the actual displays with respect to the center point of the observation. So, for example, say you want a text label (whose actual width in the main display depends on the data it is showing) to be aligned so that its upper right corner is at the latitude of the observation and a little right. You would set the shape's alignment point to be "NW" and then position the shape so that the Y of the alignment point is on the X-axis and the X of the point is a bit right of center.
The Center menu in the popup-menu allows you to center the alignment
point vertically and horizontally.
You can also align a collection of shapes. First select the shapes (shift-click). Then select one of the six alignment icons under the top menu bar; the left most icon means align all the selected items under a horizontal line.
To save a station model you have composed, use the
File->Save or File->Save As...
menu items. When you save a station model any point data displays
that are using it will be updated. To remove a model, use the
File->Remove
menu item. You cannot remove a model supplied with the IDV, but you can
remove local models.
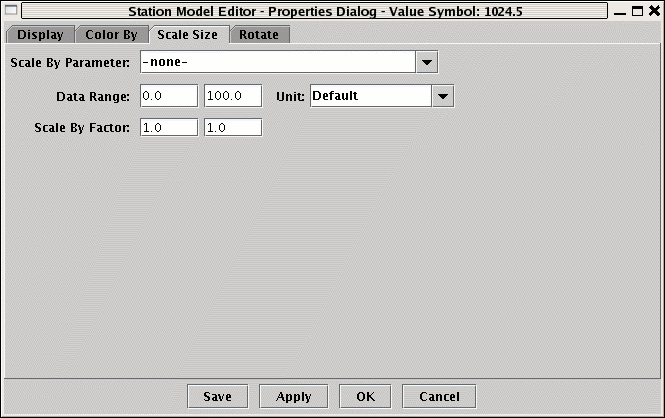
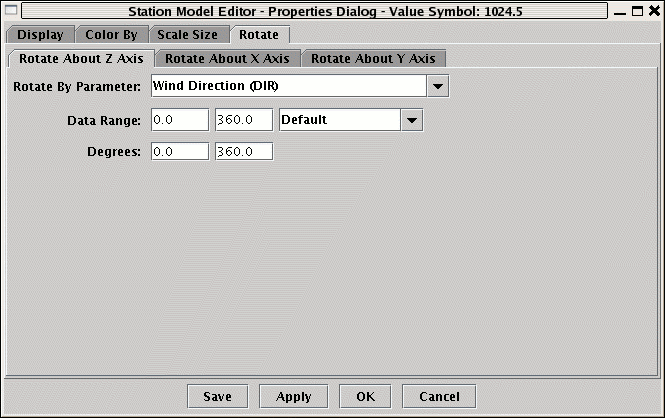
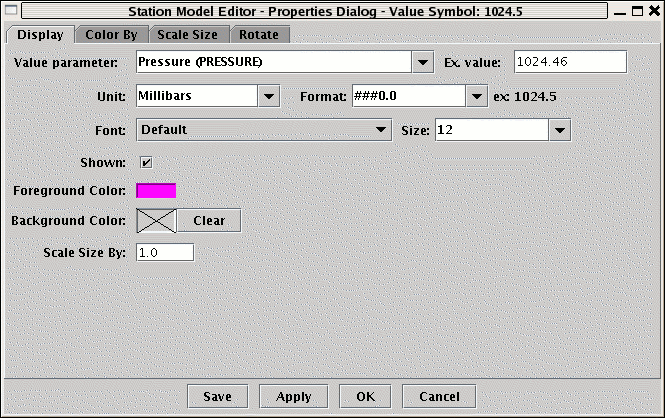
You use the Properties choice in the pop-up menu
to show the properties dialog window for that shape. The properties
dialog is made up of a number of tabs.
Note: The Apply and OK buttons applies the properties
to the shape in the editor. The OK and Cancel buttons
closes this dialog. The Save button does and apply and also saves
the station model as a whole (just like doing File->Save).
When the station model is saved then any displays that are using it are updated.
The Save button allows you to see what your changes to the properties
will look like in the main display.
Parameter identifiers within a station model can hold embedded Jython code. This allows you to do operations on the values and provide more extensive formatting. Any parameter that begins with "=" is treated as a Jython expression. For example, you can enter:
=T-TDto calculate the dewpoint depression. You can format the text that is shown. For example you can enter:
='TD:'+str(T-TD)This will result in the calculation of T-TD, a conversion of that result to a string which is then concatenated to the string 'TD:'. If you want to format the result of the numeric calculation using the format specifier from the properties dialog simply enter:
='TD:'+format(T-TD)
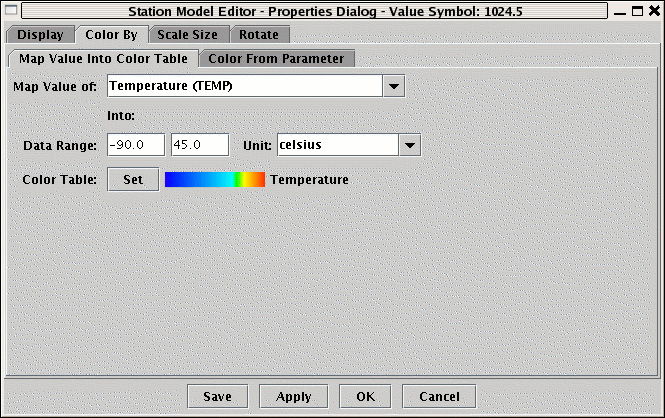
For example, in the above image the Temperature parameter has been specified with data range -90-45 celsius. For each display the IDV will find the Temperature value (e.g., 15 celsius), convert it, if necessary to the specified unit, find its where is lays within the range and use the corresponding color from the color table.

To get more lines press the Apply button.